Now that we’ve had two weeks of scrap quilting tips, it’s time to talk borders. There are a lot of border types that can enhance your scrap quilt or you can choose no border. That’s the purpose of this post, to help you decide what you want to do. I will show you what I have done with my quilts. My borders range from plain to scrappy to appliqué to borders with secondary design elements. Borders are a way to frame the main design and also make a quilt bigger. So no matter the reason, the border you choose plays an important role in the finished project. Let’s get started!
Plain Framing Borders
Some borders are just there to frame the central design of the quilt pattern and not interfere with the design itself. These borders are simple and don’t take too much effort. The main thing you need to decide on is what colors you want to draw out when you are framing it. Here is one of my quilts, Stepping Stones, with a plain border:

Since the body of the quilt is framed by red print triangles, My first border is made of of strips of a brown print fabric to frame the center. I could have stopped there, but I wanted to make this quilt a bit larger. So, I added two more plain borders to create a matte look frame for the quilt. Compare this to the quilt below, Marbles & Jacks:
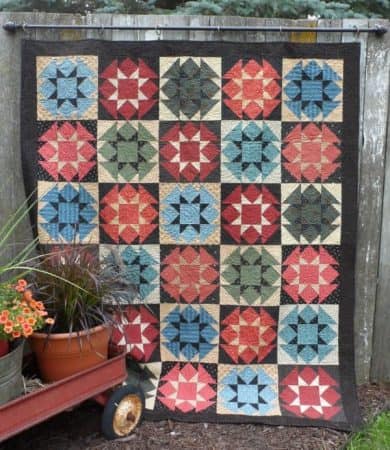
On this quilt I only framed the blocks with one plain black print border. I did this so the blocks are the star of the quilt and the border fades into the background.
Using Scraps for Borders
When you’re making a scrap quilt, you often have a lot of left over scraps. Since they coordinate with the quilt you just made, why not make a pieced border to add to the design? This first example, Star Struck, is a quilt with a pieced border with no plain border in between.
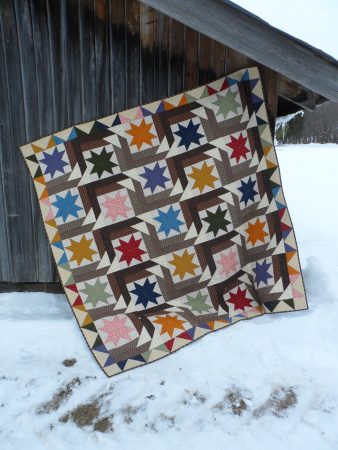
I think the pieced flying geese border plays off the blocks better with no plain border in between, although a plain border in between would be good as well.
My next example of a scrappy border is my quilt, Scrappy North Stars. I featured this one is the post a few weeks ago demonstrating how to “calm” a quilt with a lot of fabrics. I did it by using a plain black print border strip to frame the central blocks and to help show off the scrappy piano key border.
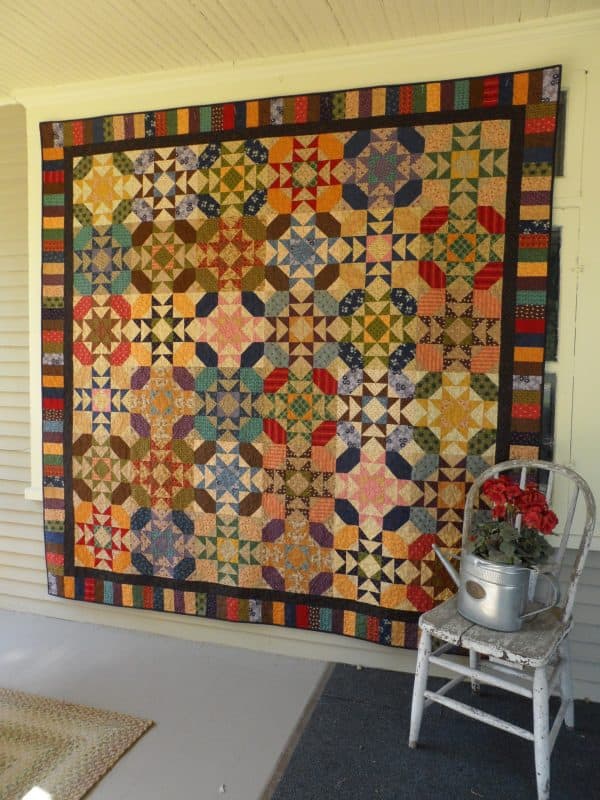
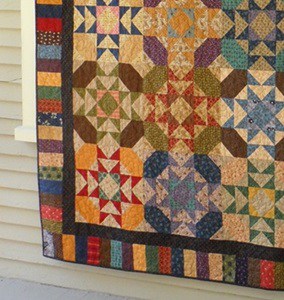
Finally you can add a plain border as the last border after a pieced border like I did with my quilt, Sister’s Reunion.

Appliqué Borders
One of my favorite things to do is to add appliqué to a plain border to finish off a scrap quilt. I decided that appliqué to frame the 100 scrappy blocks in both of the examples below adds a unique frame along with the plain border.
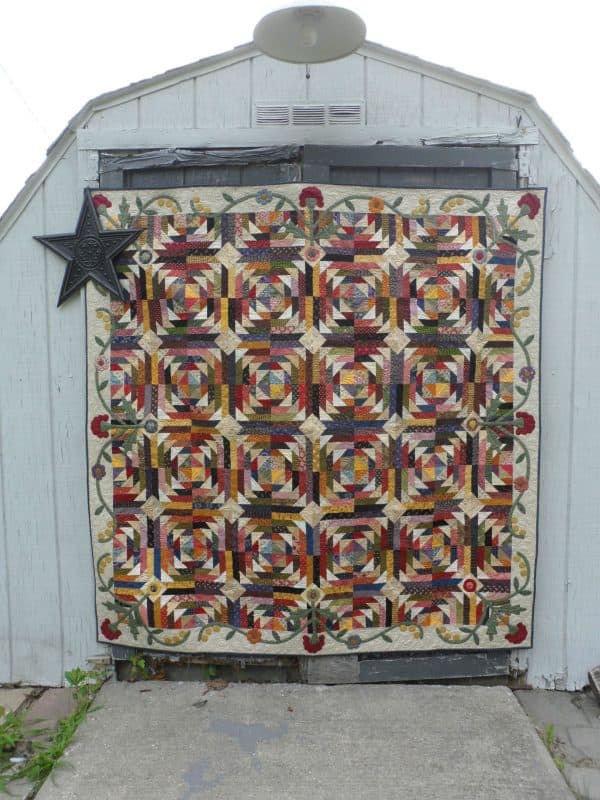

I think the appliqué in the border also adds a calming effect to the scrappy chaos of the blocks.
Borders From Block Elements
Another fun way to frame a quilt is to pull out an element from the blocks that make up the central quilt design and use that as a pieced border. It’s a way to tie the border to the theme of the quilt and also a way to use up extra fabric. Here are two simple examples. First, Star Wheels:
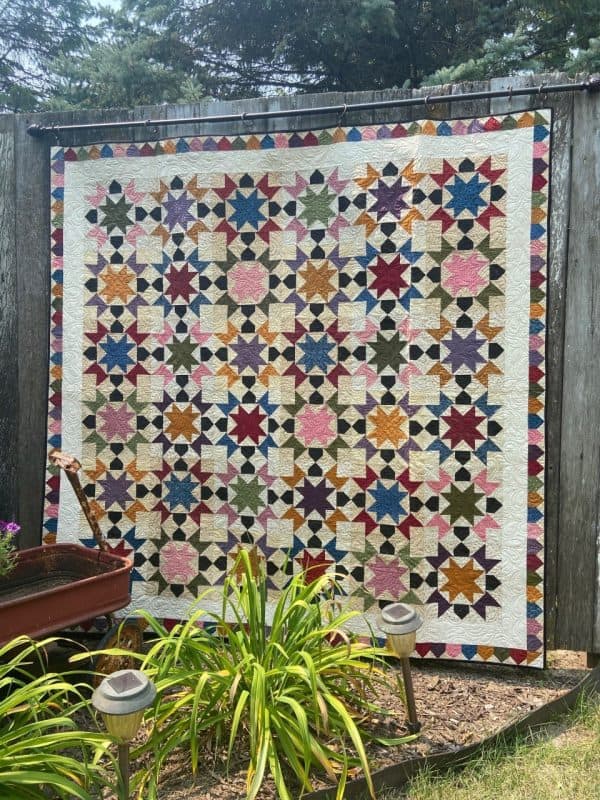
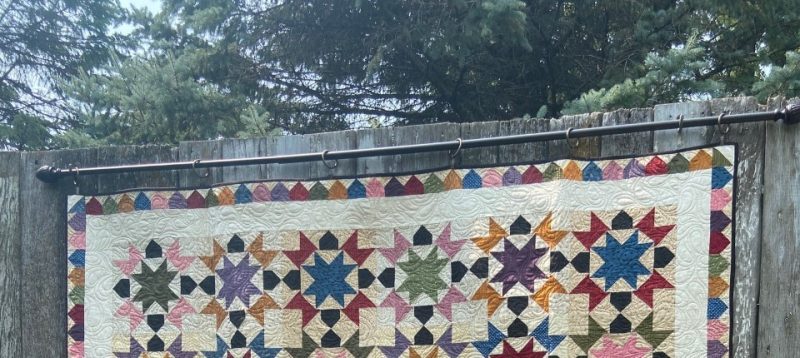
The photo on the right shows the detail. The black element from the block is pulled out and used as a scrappy, pieced border element. My quilts, Trinkets and Paper Chain also use this concept:
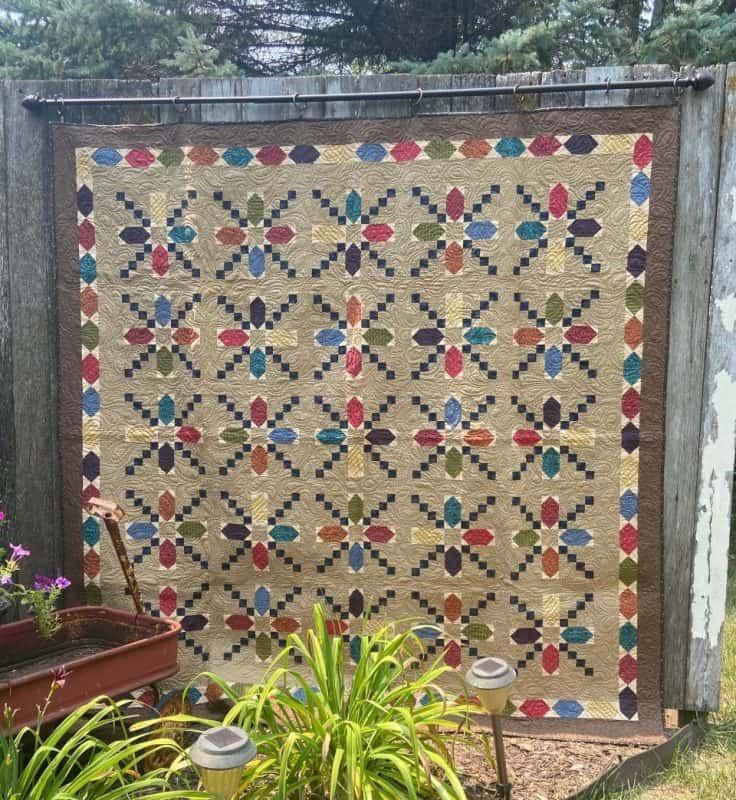
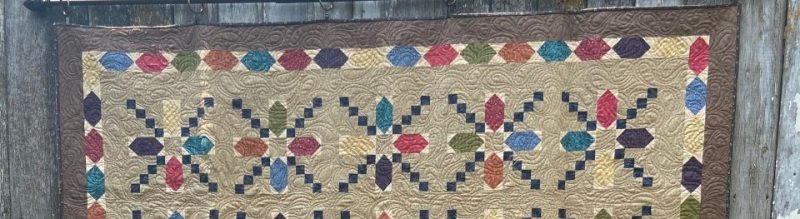
The Trinkets border is similar to the one I used for Star Wheels above, except the pieced border is sandwiched between two plain borders. But it is inspired by a unit from the blocks.
In Paper Chain (below) the border is a little more complicated because it is not just one element of the block, but basically a repeat of a larger portion of the block.
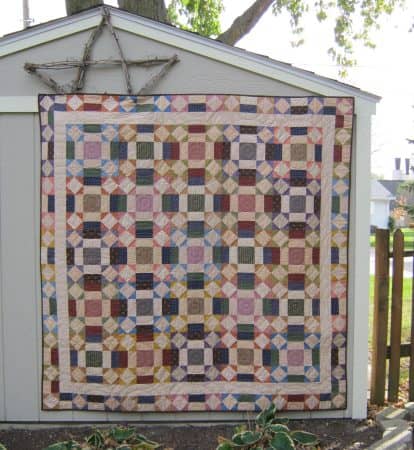
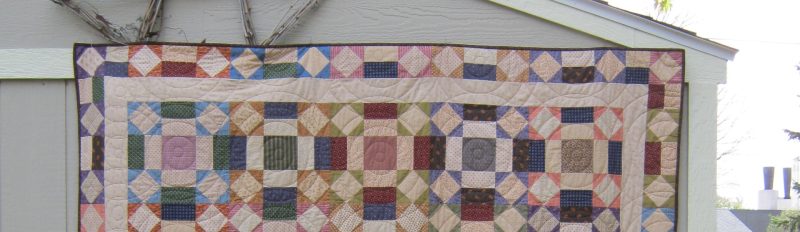
So you have several options with this type of border. I generally pair this type of border with some kind of a plain border that helps define it.
Secondary Design Border
I like to use a border to create a secondary design. I did this with my quilt, Homestead Trail.
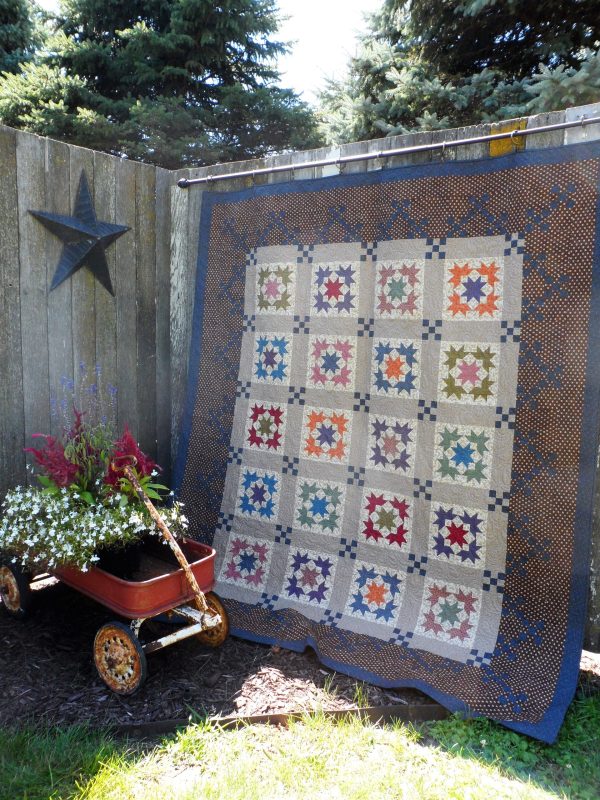
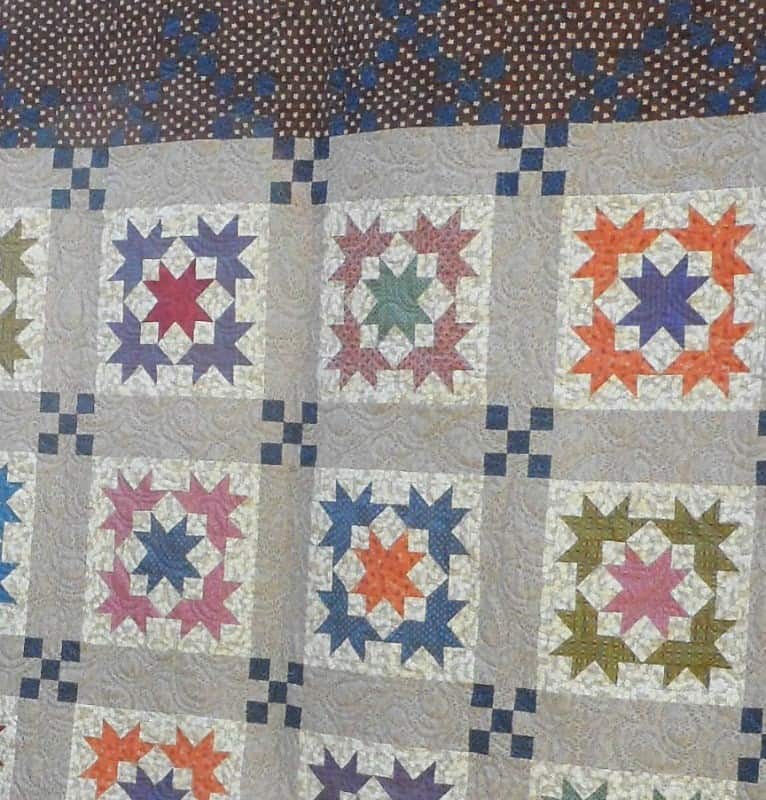
I worked a checkerboard design into the brown print border to create a fun zig-zag design.
No Borders
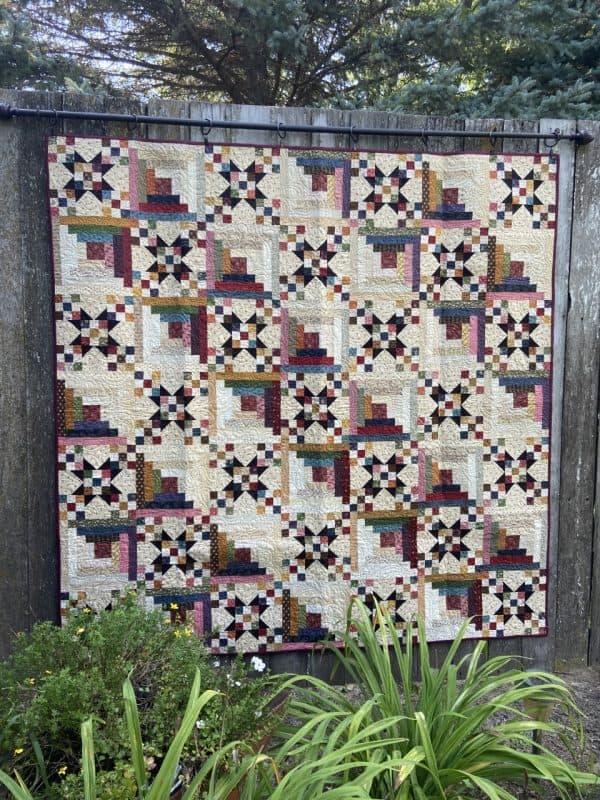
Finally, there are some quilts that just stand alone and don’t need a border. These quilts are “framed” with the binding only so that the design of the blocks is the only thing that the viewer sees. Don’t be afraid to go the “no border” direction. If you have enough going on in the quilt pattern itself, you might not need one! Here are two that I’ve made that I thought looked good enough and had enough interest that they did not need a border.

Measuring the Quilt Top
As you can see from this post, whether you are adding a plain border or a pieced one, it’s important to have exact measurements for your quilt top. I’ve been asked in the past what is the best way to measure your quilt top for accuracy. Here’s how to do it:
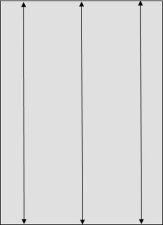
- Step 1: Measure your quilt top vertically in 3 places. On the left, in the middle and on the right. Add those numbers together and divide by 3 for the average. (See diagram below) That will be the length of the border strips for the sides.
- Step 2: Attach the side border strips and then measure the quilt top horizontally in 3 places. Through the center and on the right and the left. This will be the length of the border strips for the top and bottom. (see diagram)
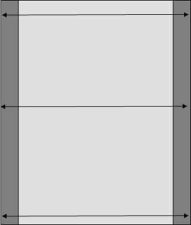
- Step 3: Add the top and bottom borders:
This works for both plain and pieced borders. If you are wary about doing a pieced border, definitely measure the top and put a plain border around the quilt top that makes the size of your quilt compatible with the pieced border you want to add.
That’s it for this week. I hope you have learned something about borders from this post. Now you’re ready to make a scrap quilt and border it! Leave a comment or ask any questions below and I will enter you into a drawing for my pattern, Homestead Trail. The drawing will be on Monday, April 1st. **We have a winner! Congrats, Judy Smith!**
Happy Quilting!


I always struggle with measuring for borders so I appreciate this information!
You have so many wonderful ideas! Thanks so much.
I love your applique borders!
Great ideas for borders. I so appreciate all of your posts!
Beautiful scrap quilts.
Thanks for the great ideas on pieced borders!
So creative! So many ideas. Really enjoyed all your examples. I do love the appliqué additions.
So for the top and bottom borders you should also use the average of the three measurements?
Hi Ginny,
Yes. That’s the case. Hopefully, your quilt measures evenly in all three measurements if you used an accurate 1/4 seam allowance in piecing.
My guild makes a lot of charity quilts which are often just very simple scrappy blocks. How nice it would be to add a border to make it special. Love your suggestions!
Great info! Thanks!
Thanks for all the wonderful boarder inspiration. It shows how much the right boarder adds to the quilt.
Wonderful information on both design and construction in one place.. I will be referring back to this post when I finish a quilt.
Thanks.
Always look forward to reading your tips on Monday mornings. They help in so many ways and I go back and reference them when I need help…which is often.. thank you
Just wondering…how do you decide which idea is best for your quilt? Do you make a little sample portion and try it? Do you take a photo, print it on paper, and try different drawn ideas on transparency over it? Or do you just know what will be best? I love your ideas, just not sure how to apply them in practice.
I have a the quilt designed on my Quilt Pro program and there I am able to try out my ideas. Normally, if the quilt itself is really busy, I like the idea of a plain border separating the quilt top from a pieced border. Also, to be honest, I often have a plain border before the pieced border to make the math work out.
You provide a lot of great information. I really appreciate that on your patterns featured you provide a copy of the back, which makes it is easier to think about what stash a quilter might have available.
Appliqué question for you-I am trying to work on UFOs this year and need to add two vertical vines that have the same shape on the panel. Do you have any advice on how to make them the same. Should I draw on freezer paper? Thank you. I plan to start studying your appliqué tips.
Hi Linda,
Are these vines on the border of the quilt? When I have to appliqué vines on a border, I use a chalk pencil to draw the shape I want the vine to take. Then I take my bias stems and glue them down following the drawn line. Then stitch in place. I hand stitch the whole vine. There is something called appliqué paper. I have not used that product but some of my quilter friends have to help in placing their appliqué. Here’s a link to the product and you can read up on it.
https://amzn.to/3PB2apy
Love the appliqued borders!!
Lots of good ideas for borders, thanks!!
I love all the variations of the pieced and appliqué borders.. so beautiful and a professional finish!
Your Homestead Trail is lovely.
Thanks for the info.
I loved reading this blog entry-the thought process behind why you chose each border, and picture examples of each type of border, make for very clear and useful information! Thank you.