Earlier this year I wrote a post on making your quilt bigger. One of the options was to add a border to the quilt. Of course, a border of plain strips can be added and you can call it done. But, what if you wanted to add more “personality” to your quilt or to enhance the design of the quilt top blocks? I’ll share a few ideas here, including on whether you need to have a border. Let’s go!
Do I Need a Border?
Your quilt may not need a border. I’ll show you a few of mine where I decided against a border to demonstrate. Generally if your quilt is very busy or has a prominent secondary design that emerges, you may not need a border.
First, my quilt Twinkling Log Cabin:
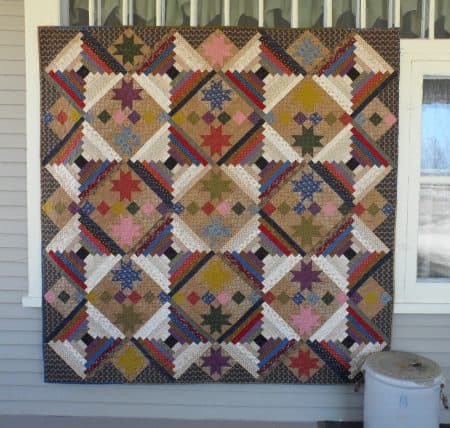
The two different blocks in this quilt each have a lot of pieces and are very busy. You could put a plain border on it to make it larger, but I think it would detract from the design. If you wanted to make this one bigger, make more of the blocks!
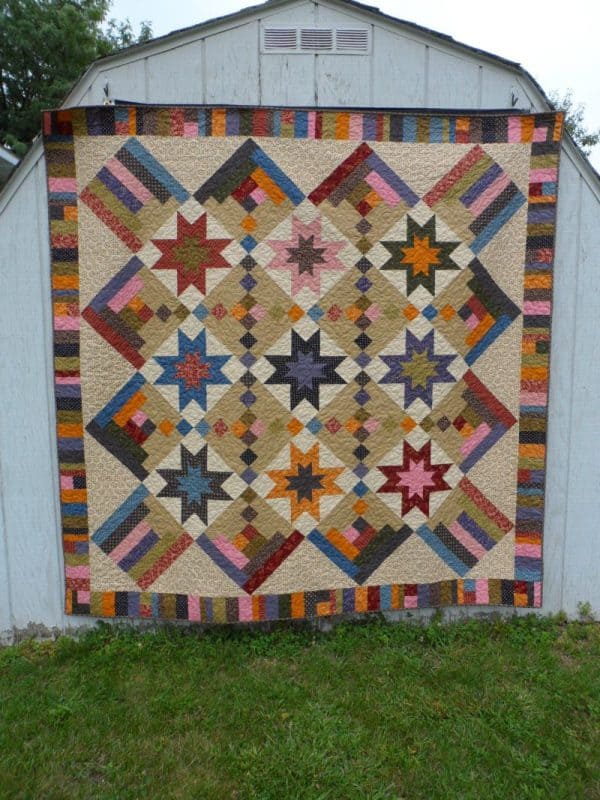
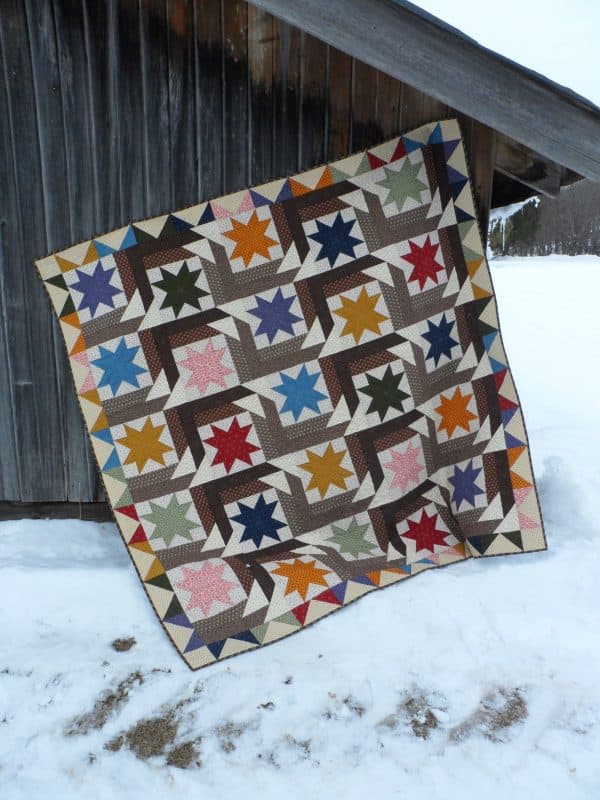
This next quilt really shows this concept. With Strips & Stars below I think adding a border would detract from the diagonal secondary design pattern that emerges when the blocks are pieced into a top.

Once again, to make this quilt bigger, I would recommend just making more blocks and adding to the rows and columns instead of adding a border.
Types of Borders
Now if you decided to add a border, here are some of your options. They range from easy and plain to pieced to appliqué.
First are plain borders. These borders are the ones quilters generally added to make a quilt bigger. I like them because they create a frame to enhance a design but also do not draw your eye away from the design. I call these “quiet” borders. Here is one example:
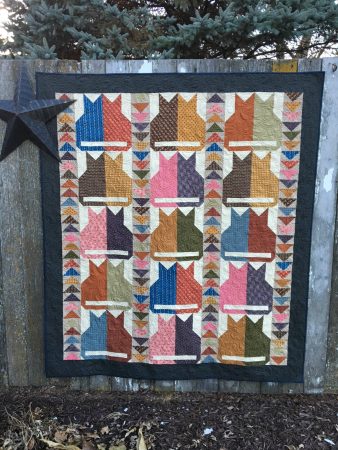
You can see how this border doesn’t bring attention to it, but enhances the pattern it frames.
This next example, Stepping Stones, shows how you can use these plain borders to increase the size of the quilt while creating an interesting frame.
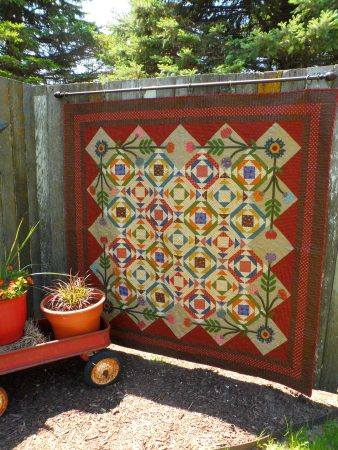
There’s three plain borders on this quilt. The first inner plain border in dark brown contrasts nicely with the setting blocks of the quilt top so it enhances the design. Since I wanted the quilt to be a bit larger, I added the additional borders. I could have just added a wider red print border, but I thought finishing it off with the brown outer border tied everything together.
Next, pieced borders can be just one pieced border or a combination of a pieced border and a plain border. In many cases, I use a plain border to size the quilt top to the size needed so the pieced border I have chosen fits. Here’s two quilts that have a pieced border only:
With Skylight on the left, I did not need a plain border to size the top fit it because I went with a scrappy, random border with strips that were different widths. Easy to make fit. With Star Struck on the right, I was lucky that the quilt top measurements were perfect to fit the flying geese border with out an inner plain strip.
These next quilts needed a plain border to size it for the pieced border to fit. This makes it easy to do pieced borders, you can always get it to fit if you start with the plain one.


For Star Trail on the left, I used plain border strips that is the same fabric as the setting triangles. This way the plain border sizes up the quilt for the pieced border, but isn’t obvious. With Constellations on the right, the plain border to size up the quilt is darker than the quilt top so it creates a frame and makes the quilt top the right size for the pieced checkerboard border.
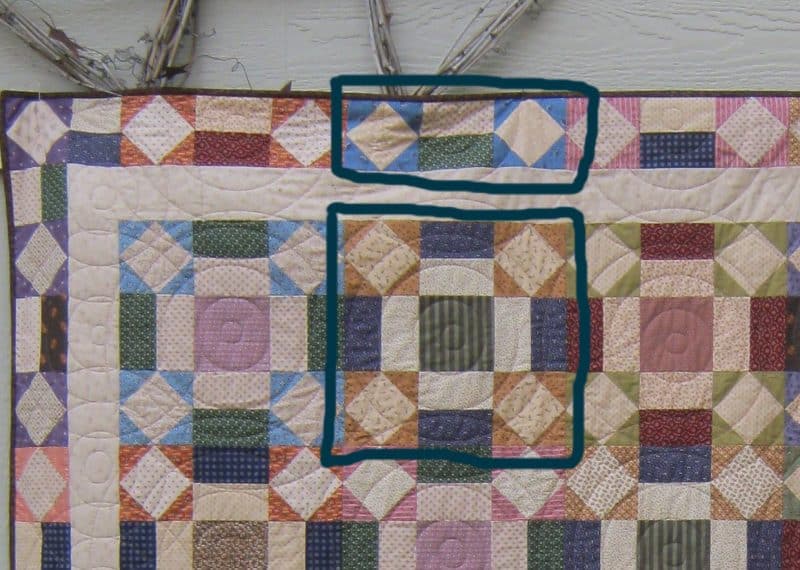
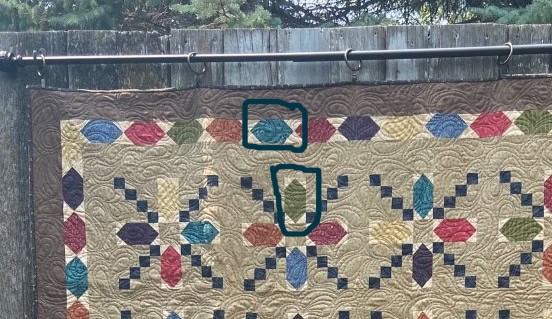
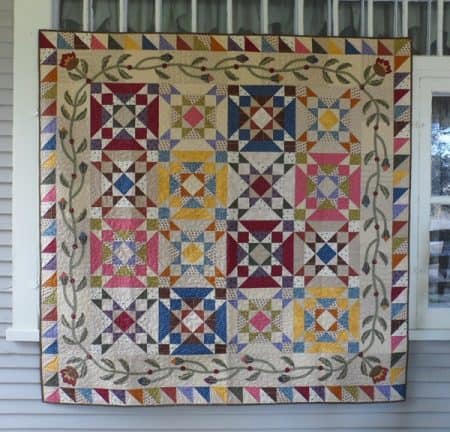
Here’s a fun thing you can do with pieced borders. Pull out an element from the quilt blocks that make up the top and use that as a border. Here’s an example from three of my quilts:

Finally, an appliqué border is the best way to add in your unique personality. It’s also a great way to accent a plain border. These are two of my favorite scrap quilts where I did this:
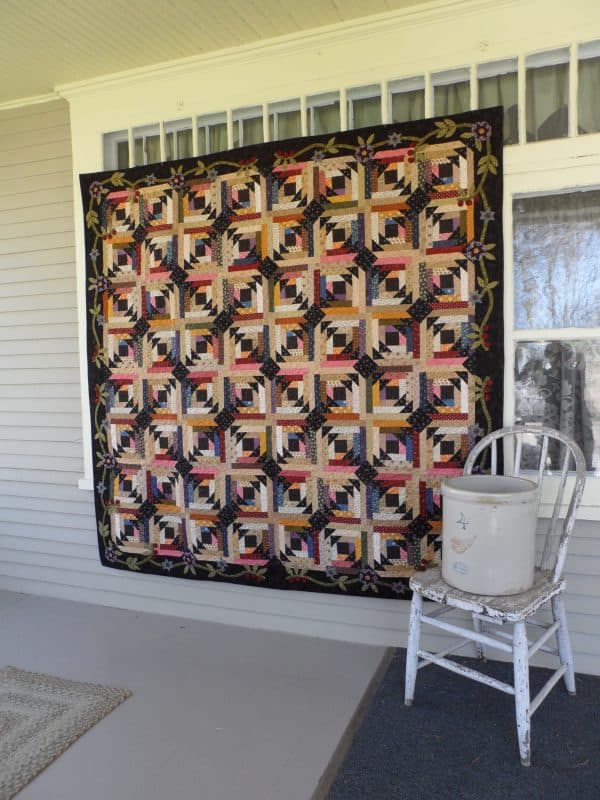

Here’s a quilt that actually employs all three border types, plain, pieced and appliqué! Of course I started with the plain border to size up the quilt top for the pieced one, then added appliqué to the plain border. That was fun!
Be Creative!
Here are some fun pieced borders that are a bit unusual. I had fun coming up with these and I think they add a lot to these quilts. Most of the time, I will do really unusual borders on smaller quilts first, like wall hangings or table runners before trying it out on a large quilt.
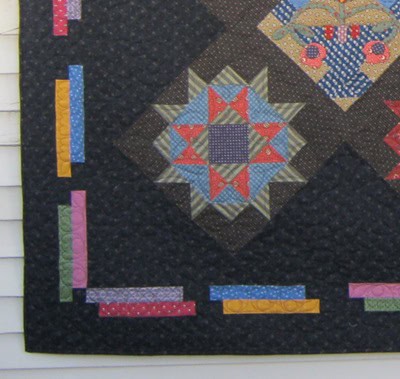
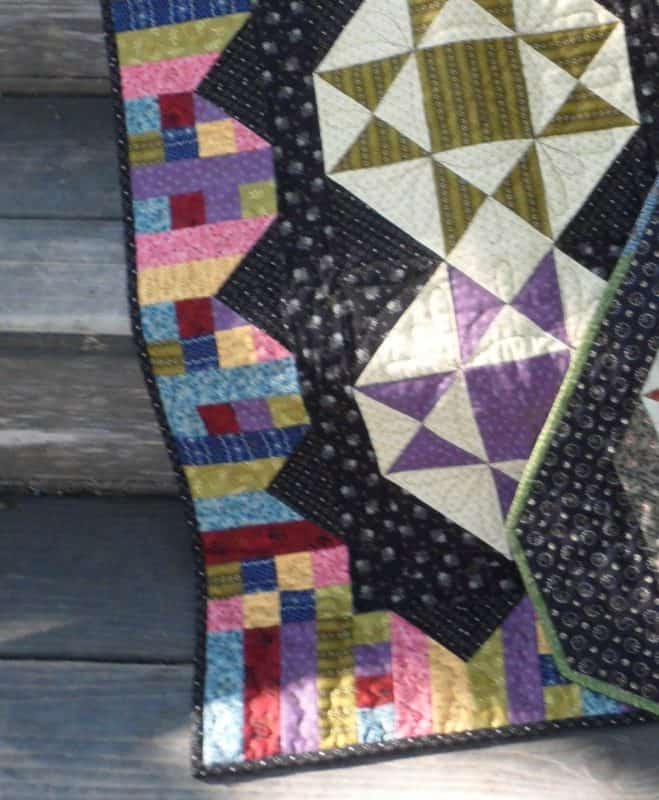
So the moral of this post is to be creative with your borders if you decide to add them. It will make your quilts truly yours with the personalization.
Comment below or ask a question and be entered into a drawing for my Star Trail quilt:
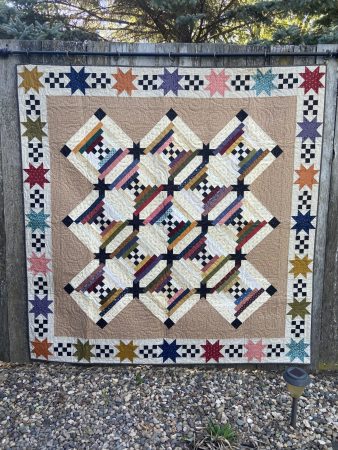
The drawing will be on Monday, June 9th. Good Luck! **We have a winner! Congrats, Mary Wright!**
Happy Quilting!
Deanne


So many great ideas! I saved to my Pinterest files.
Glad you like them!
Such creative examples! I love the appliqué border combined with the pieced border. It is difficult to add a a flying geese as a border, to get it the correct size.
Thanks!
Thank you so very much for all the help and ideas that you freely give to us! I love all of your quilts. Pieced and applique ones it always so hard to choose a favorite.
You’re welcome!
Your blog is like a mini quilt show. Thanks for the tips.
You’re welcome!
My question is this-how do I determine how to make a pieced border to fit? Example -flying geese. Thanks
To make a pieced border fit, I decide first on what I want as the pieced border. Then I make my quilt top the right size by adding a plain border to “size it up”.
For example, if my quilt top measures 61 x 61” without the border and my border flying geese are 4”, I need a size that is evenly divided by 4”. So, I add plain borders to the quilt top to make it measure 64 x 64”, a number divisible by 4, so a border row of 16 flying geese will measure 64” and fit.
Hopefully this explanation helps!
Such beautiful borders! They inspire me to think of other ways to use blocks for borders.
Thanks!
Thank you for your great border ideas. I will have to try some of them on one of my quilts.
You’re welcome!
Love all your borders. I need to incorporate pieced borders more often. I love the way they look. Thanks for all your great ideas.
You’re welcome!
This tutorial is like a book on creative borders. Thank you so much for all the wonderful examples. Each border perfectly complements the quilt.
Glad you found it useful! Thanks!
Thank you so much for all the information. Your quilts are beautiful. They sure give me motivation to try something new.
You’re welcome!
Beautiful and creative ideas!
Thanks!
Wow! These quilts are beautiful.
I learned a lot about borders from your post. Now when I see quilts and quilt patterns I’ll pay attention to both the design and the borders and apply your insight…remembering to have fun creating. Thank you.
Thank you! Glad you learned a bit from my post.😁
Thanks for the great border ideas!
This is such a timely read for me! Your response about how the measuring works is very helpful, Ive just the project to try it all on! Thank you!
You’re welcome!